Getting Started with CME CloudPurchase
Installing CME CloudPurchase is pretty simple and consists of the following steps:
- Install the plug-in from the Unity Asset Store.
- Get the AWS Credentials.
- Make the first deployment.
- Configure access keys to the Google Developer Console.
Get your AWS security credentials
If you do not yet have an AWS account, we recommend following the instructions in the official user guide.
If you already have an account, you can move on to getting the access keys.
Generating security credentials
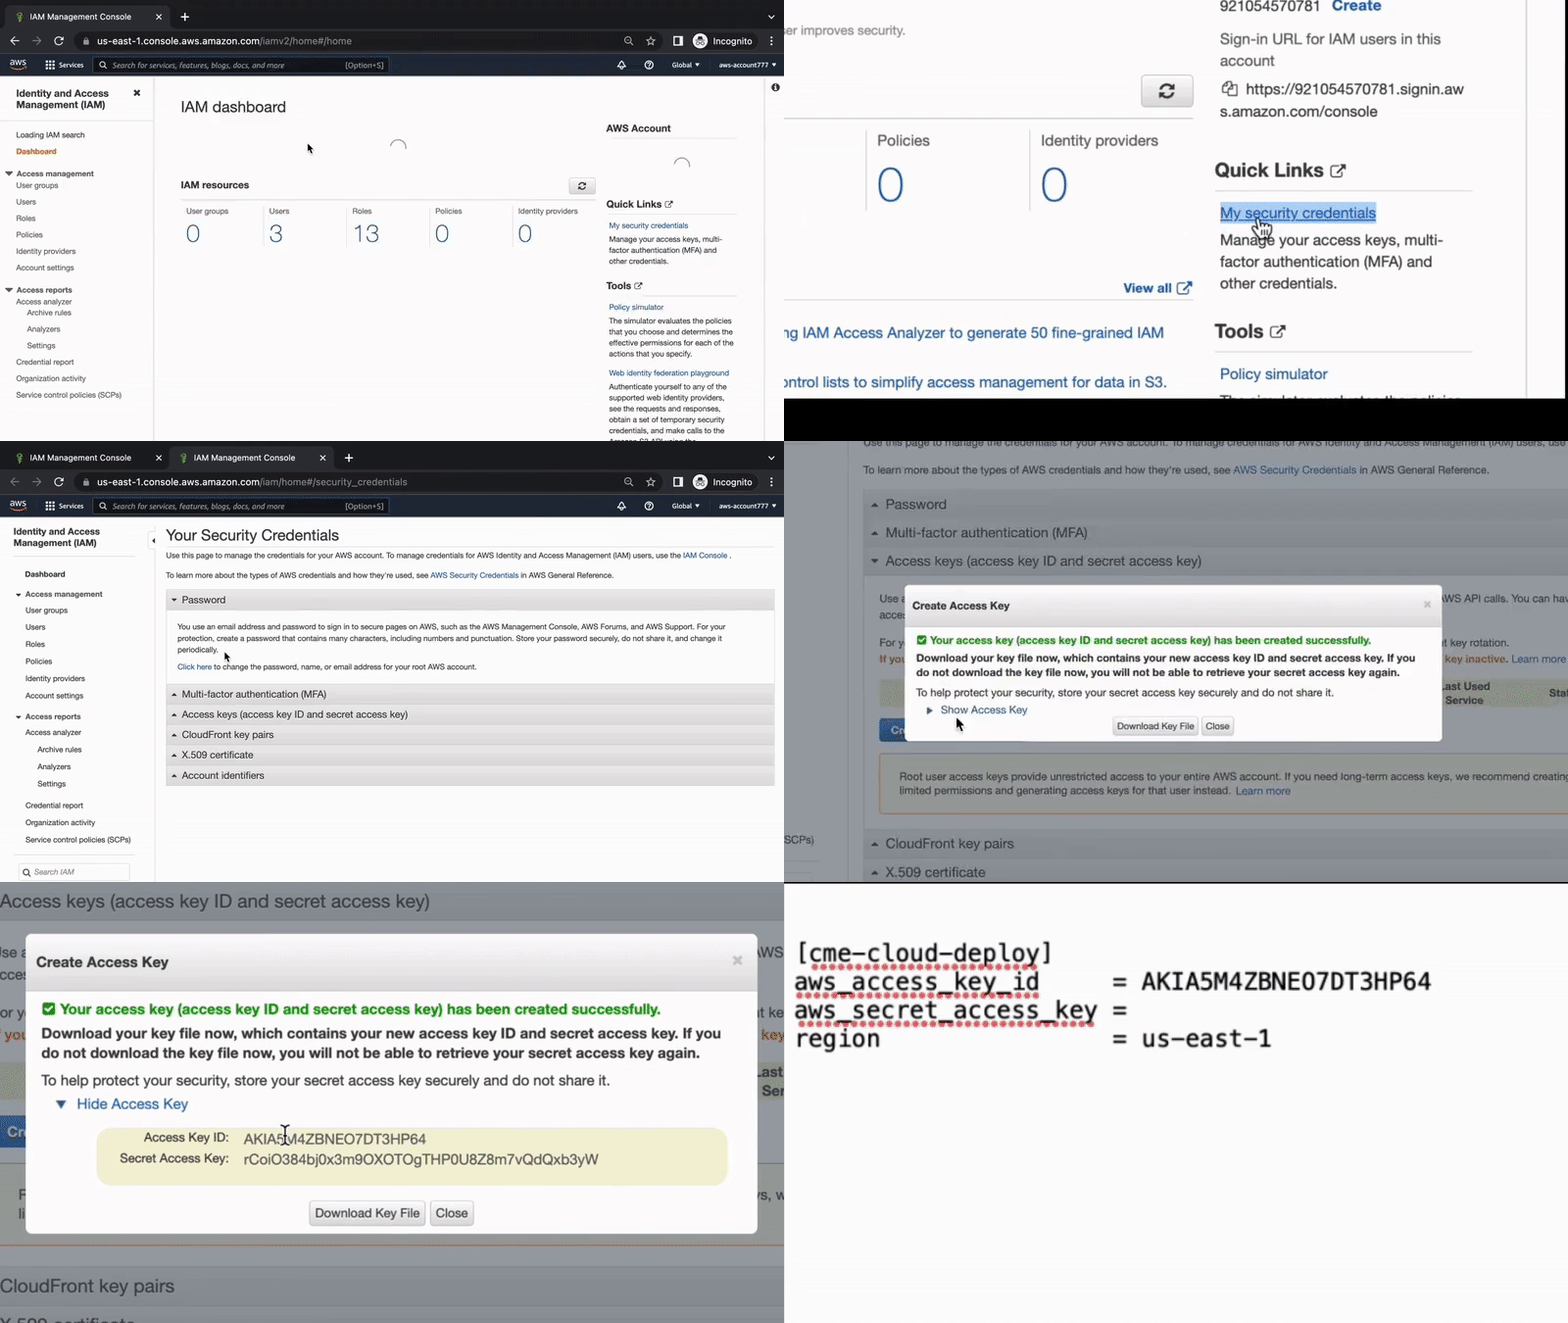
For access keys, go to Identity and Access Management | Your Security Credentials and get an access key by following the steps below:
Make your first deployment
Warning
Payments in the Google Play Store cannot be verified without the configuration of Google Developer Console access keys. Therefore, the verification may display an error:
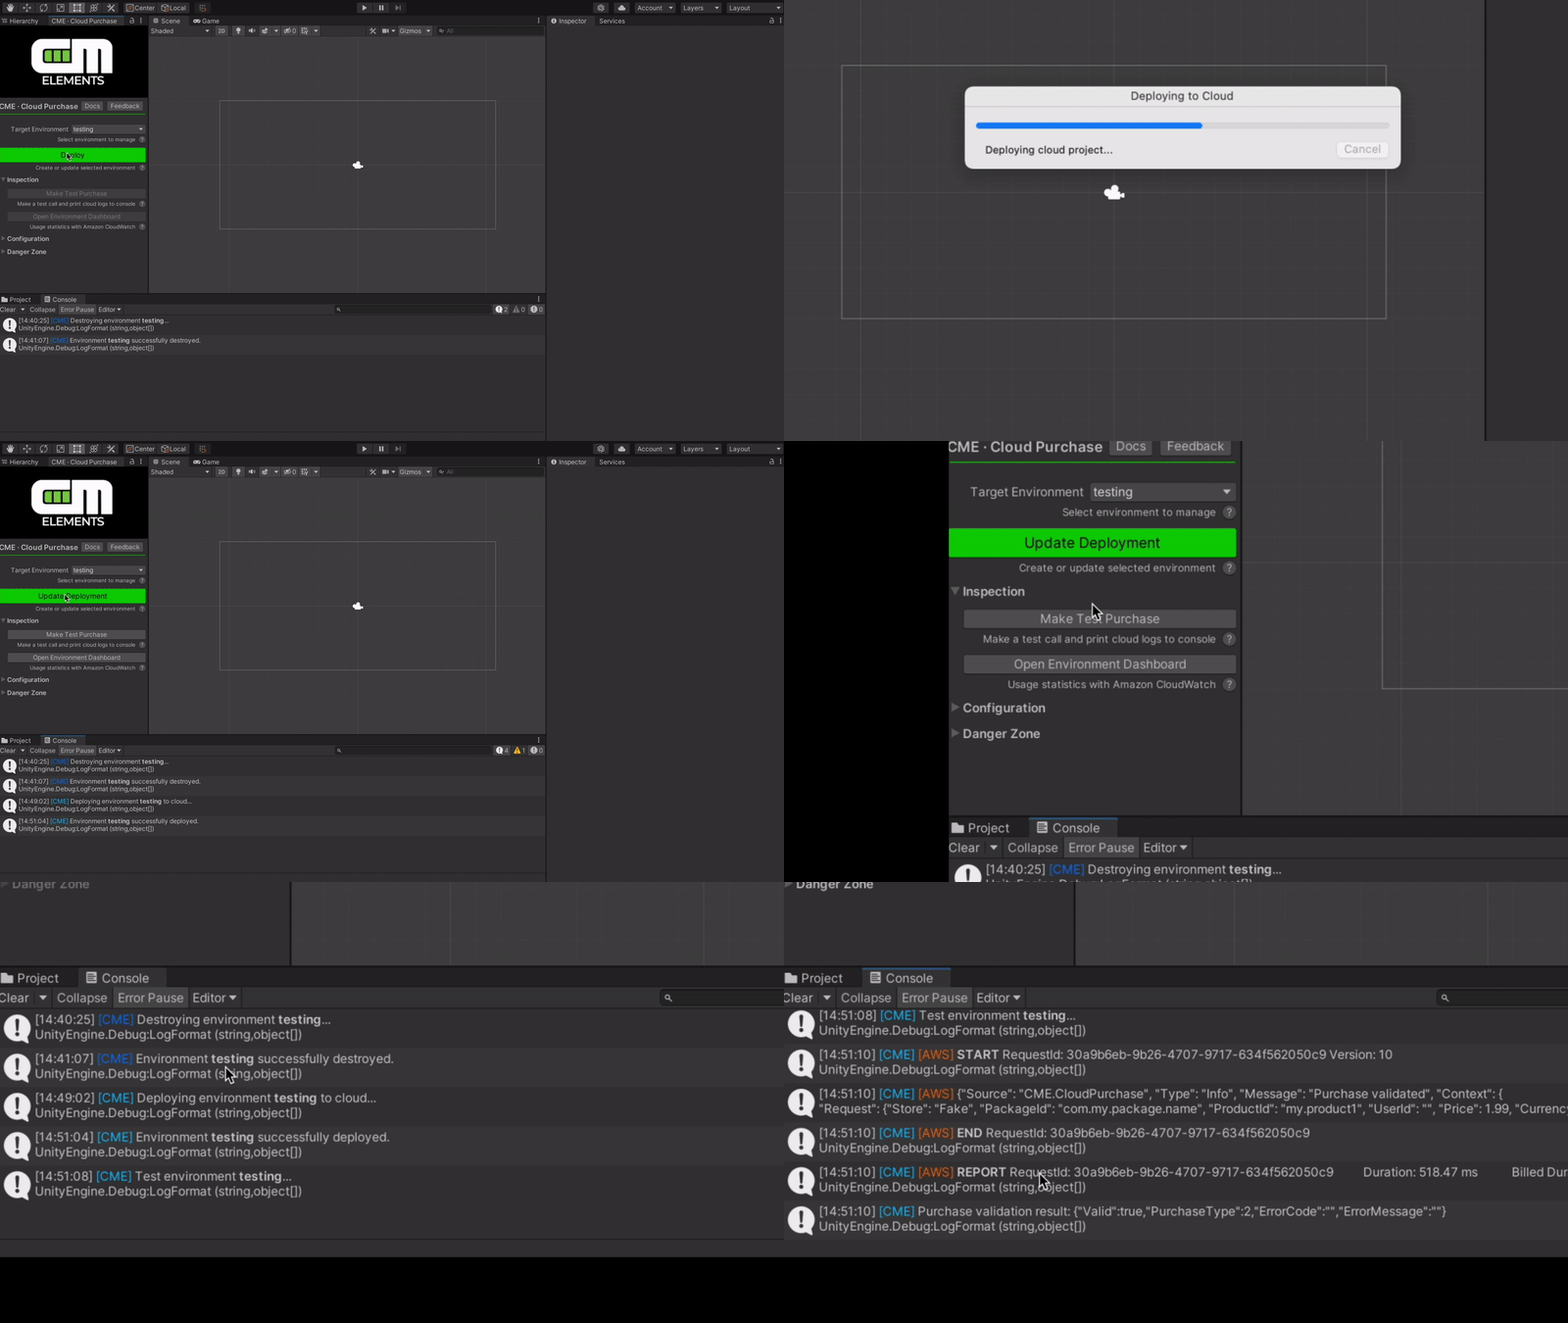
You are now ready to deploy your first CME CloudPurchase application. To do this, open the Unity Editor with the plug-in installed and click the Deploy button:

You will most likely have to install the generated AWS access keys into the opened '.aws/credentials' file in your home directory. See the official userguide for more details.
Configuring stores integrations
For access keys to Google Developer Console, go to Google Play Console and follow the steps below:
-
Set up a service account.
-
Generate a new private key.
-
Set up the necessary permissions for the account.
See the official userguide for more information on the process of creating and setting up a service account.


